Showing posts with label art. Show all posts

Tuesday, May 10, 2011

Chicks - Week 2: Drawing Chicks

These are our last few days with the chicks.  The children are really involved with observing and documenting their growth and the changes they see.  Here are a few pictures of them drawing the chicks from real life.  This is an important process.  This looks like an art project, but really it is also a scientific process and a pre-writing activity.  Children have to observe closely and pay attention to detail when drawing from real life.  It is a great idea to keep a spiral notebook or other writing notebook with you when you travel in the car, out to eat or to the store.  Ask your child to draw what they see.  People, food, places.  Doing this multiple times at the same place (like the grocery store) shows you how their drawing/writing skills improve with practice.  Drawing and writing are basically the same.  You have to learn how to make lines to form symbols that represent what you see (or to make meaning on paper).  Most of us were raised learning to write by having to write spelling words over and over and over again and dreading it!  During this activity many of the children were independently trying to write or they were finding other ways to use letters to represent and remember their thoughts and feelings.  This is how you raise a child who loves to write, loves words and loves to learn.  This is a very different approach to writing than most of us were raised with.  I hope these pictures help you see how successful, involved and excited these children were about writing and drawing.  Try this at home.  You don't need chickens to do this, just find something that sparks your child's interest.  Even trying to draw Sponge Bob will do!  Then have them draw a real sponge and compare the two.  Just have fun.  Oh, and you have to draw too.  You have to model what you want them to do.  Enjoy the pictures and I threw in one video not related directly to the drawing project just for fun.

The drawing/writing lesson started out by asking the children to look at how much the chicks had changed over the past week.  They noted that the biggest change was that the chicks were getting feathers and were starting to fly.

For the morning and afternoon classes we placed a few chicks on the table (with newspaper underneath, you know why!) and a laundry basket on top so they could see the chick and gave them paper and crayons.  We asked them to draw what they saw.  Those were the only instructions.  It is best to leave this type of activity as open-ended as possible.

Here the chicks are patiently waiting as the children start the process of drawing what they see. 

Busy hands, busy chicks. 

You can see that different children are at different stages of their writing abilities, but they are all deeply involved in the process.   It IS NOT about the results, it is about them being excited, involved and proud of their efforts that count.
Notice how the children are working side by side without comparison or competition.  Each child could tell us about their picture and what it represented.  Even though the drawing may not have much meaning to you, it has a lot of meaning to the child.  Avoid the standard "that is beautiful" and use more meaningful statements and questions such as "what do you like best about your picture?", "why did you pick those colors for your drawing?", "tell me about this part of your drawing?" and/or "what is you favorite part about your drawing?".  This creates children that are intrinsically motivated to do work and are not working just to get peer or adult praise.  These type of comments and questions show the children you are really connected and encourage children to do work because they enjoy it and find their work meaningful.  This leads to self-motivation and can help keep children from becoming acceptance seekers (which can lead to giving  in to peer pressure as they get older).

During our meeting time at carpet we looked closely at the chicks and compared how many toes they had to how many toes we had.  We took off our shoes and counted.  We looked at a chick and counted.  At first they thought the chicks had three toes, but when they looked closer (on closer investigation is the vocabulary we used with them) they realized that the chicks actually had FOUR toes.  One toe is smaller than the others and is hidden in the back of the foot for balance.  This child remembered that detail and added it into his drawing of the chick.  

This child is proudly showing the chicks their portraits.  A masterpiece I would say, don't you agree?

This child not only started a drawing, but also wanted to write the baby chicks name for him.  Here she is "reading" baby chicks name to him.  She then very proudly hung the picture up on the wall (but then took it down and wanted to take it home).  She independently went and found the foam letters and started writing with crayons and gluing the foam letters on her paper.  This was not part of the lesson, but she felt inspired to do this.  She was allowed, encouraged and supported to explore letters and incorporate her ideas into the "art" lesson.  This is one of the reasons we try to leave the activities open-ended and not give too many instructions.  The children need room to grow and explore, and by expecting every child to turn out cookie cutter type projects (where every project looks the same and it is obvious the teacher did most of the work) it hampers the children's growth and development and can actually keep them from learning as fast as they are naturally capable.


This video shows them exploring the chicks and looking at their wings.  They are also just enjoying being kids and spending time just basking in the wonder of holding something so much smaller than them. 

Monday, April 18, 2011

Jumping Jelly Beans!

Today we painted with jumping wind up Jelly Beans and Easter Eggs.  The children focused on fine motor skills, taking turns, mixing colors, color identification and vocabulary expansion.  They had so much fun watching the Jelly Beans jump across the paper!  They were able to explore the what happened when the Jelly Beans jumped through thin paint and thick paint.  They also made circle prints with plastic eggs and used fine paint brushes to paint with the remaining paint.  Enjoy watching the video!

Monday, April 11, 2011

Week of the Young Child - Family Night Part One

Who Are These Masked Marvels?


Tonight the Super Families of Room 411 AM class came to celebrate Week of the Young Child.

 Everyone worked together to create each child's Super Kid Super Hero cape, mask and other accessories.


The parents worked with their children using their imaginations to use the materials to create costumes that reflected each child's unique personality.  Each family really enjoyed the Process and they were not focused on the Product, truly showing their understanding of the importance of play.

The grown-ups had to use the hot glue gun, and the Dad's showed great talent in this area!

This cape is getting it's emblem added.

This mom has to handle the grown up scissors.  She is cutting a bed sheet to make the cape.  Making dress up and pretend play clothes does not have to be expensive, you just have to use a little imagination and use items around the house.

This dad is making sure his Super Kid can see through the mask.

This child wanted to be a princess Super Kid and he mom and dad helped her create super jewelry to go with her costume.  It is important to follow the child's lead so the learning can become important and relevant.  These parents did a great job supporting their child's understanding of what made her a Super Kid!

This dad is helping his Super Kid adjust his mask and get his cuff adjusted "just right" before his little hero takes off for flight.

This mom is helping her daughter use feathers to create super jewelry to go with her new cape.

This dad is helping his daughter make her design for her cape become a reality by gluing her ribbon on for her so it doesn't fall off during flight.

We will post more pictures and updates on Week of the Young Child during the week and next week.  We want to thank all of the AM parents who came tonight and supported their Super Kid this week.  We had a great time with you!  We look forward to seeing our PM Super Families on Wednesday night.

Tuesday, March 1, 2011

The Amazing Milk Magic Trick

Today we did a really cool milk experiment.  We video taped it so you could do it at home with your child.  It is simple and so much fun!  It is also an art project.  I am posting the video and the pictures for your enjoyment.  Let me know if you do this at home.  This is a great project for one of the rainy days when you are stuck inside this spring.


After we finished showing the children how to do the experiment we let the children perform the experiment themselves.  They each got their own pan and filled it half way full with milk.  The practiced their fine motor skills by squeezing one or two drops of food coloring into the milk and just one drop of dish soap into the center of the food coloring.  They then used their toothpicks to make swirls and lines through the food coloring.  They also dropped more plain milk into the swirls of food coloring to see if anything would change.  Below are the pictures of the process and the results.  The children were so involved and the experiment lasted almost 45 minutes.  Who ever said children had short attention spans?  It just depends on how interesting and relevant the project is and how involved they are allowed to be in the process.

Carefully adding a drop of blue food coloring into the pan of milk.

The food coloring immediately separates and flows to the sides of the pan when the dish soap comes into contact with the milk and food coloring.  The concepts of chemical reactions and surface tension are introduced in this activity.

Each child was able to do their own lab experiment.  Children need early exposure to math and science and they need to experience science in a way that is hands-on, fun, magical and fascinating in order to create a life long interest in the math and science arts.  This early exposure to lab experiences and science vocabulary is crucial to creating students who enjoy and not dread taking math and science classes in middle and high school.

Ta DA!  Magic.  The star pattern appears as the soap hits the milk and food coloring.


Now the children are adding additional drops of food coloring after the initial experiment had been completed.  The new drops no longer scatter when the dish soap is added.  Now the colors just merge and swirl.

Milk art.  Now our science experiment is becoming an art project.  Many times art and science are interrelated.  This is way it is critical that art programs remain in school programs.  Children become much more involved in scientific concepts when presented in artistic presentations, such as mixing different colors, different textures, solids, structures, sounds.  As we erase the arts we also erase math, language and science proficiency.

The children used vocabulary words like swirly, layers, mixing, yucky, cool, crazy, combining, coming together, floating, spreading out, moving and many more as they watched the changes as they added, stirred and mixed the colors.

The more we mixed, the more complex the patterns became.

One child said this looked like a storm cloud.  Making these types of comparisons shows the development of higher level thinking and shows that the child is assigning meaning to their art.

The children spent a lot of time trying to find pictures in their milk art.  Some saw rainbows, waves, flowers, hearts, butterflies, blood, chocolate milk, clouds, lines, and roads just to name a few.

What do you see when you look at this picture?  What can you do with a pan of milk, some food coloring, a few toothpicks and some dish soap?  How long can you play with your child, have a conversation, laugh, expand their vocabulary, ask open-ended question, have fun, connect and just enjoy each other's company?  I dare you to play in your milk!  And don't worry if you spill some, we did!

Wednesday, February 2, 2011

A winter' walk

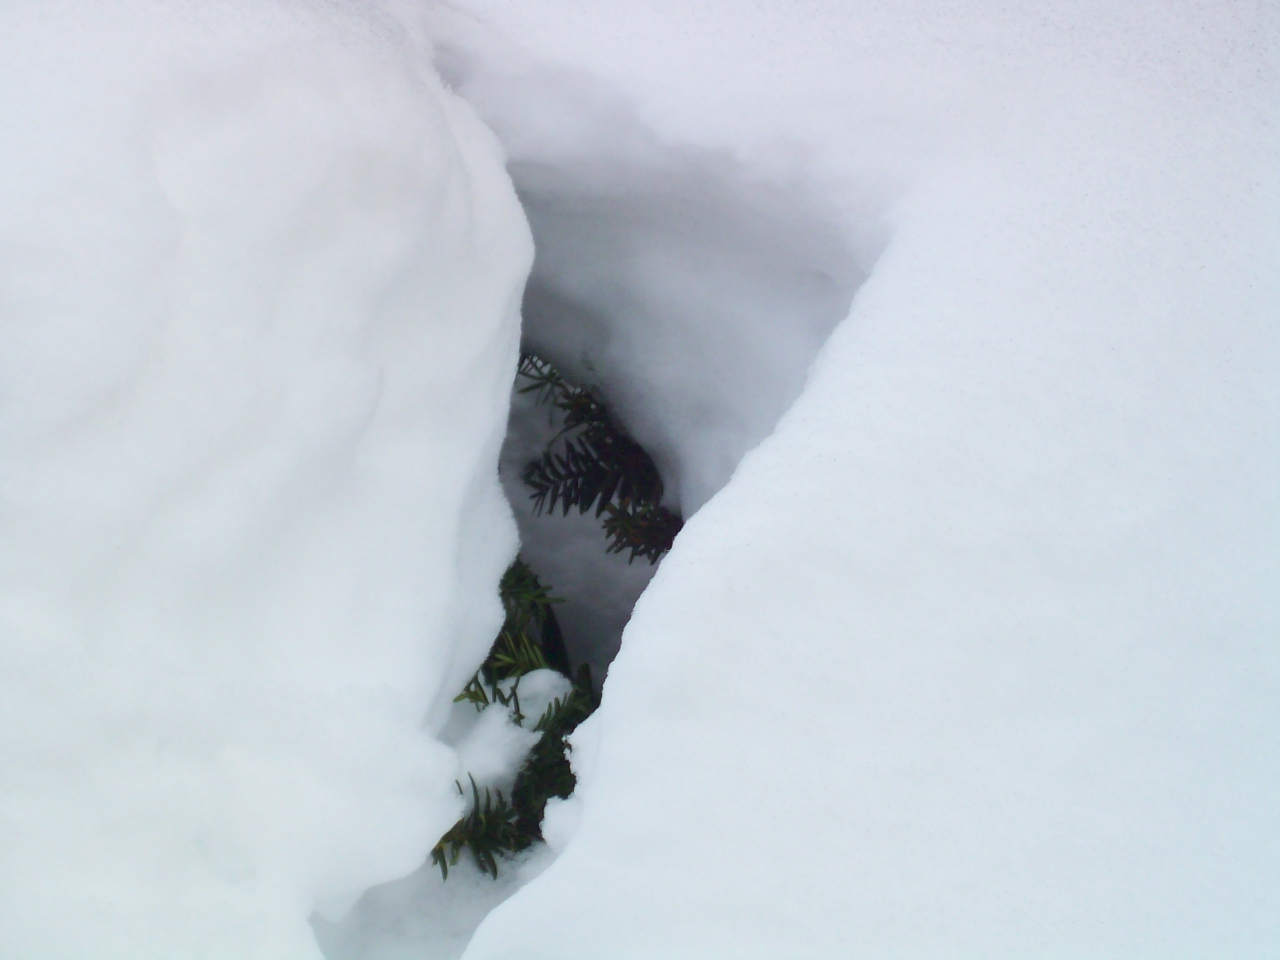
We try to let the children experience art in many different forms.  One of the forms they love is photography.  They have their own digital camera that was donated to the class last year by Leah's mom and dad.  They use the camera all the time.  After the first snow storm in January we took the children on a nature walk with the camera.  We encouraged them to look around very carefully and take pictures of anything that captured their attention.  Visual discrimination is a very important skill for reading and writing.  This is one of the reasons taking away art education in school programs is so detrimental to children's learning.  Children that have to opportunity to experience the world in many different ways, not just by reading about it or listening to a teacher lecture, have greater recall and process information into their long term memory better and more efficiently.  Children who have more hands-on experience and have multiple opportunities for those experiences make more neural connections in the brain which in turn makes learning new information easier.  This is why we do nature walks often and we have the children document these walks through photography, journaling and story telling.  This are critical components to reaching back into their memories and pulling out previous information. Children at this age learn best through imitation and repetition, so by role modeling and providing lots of opportunities to repeat activities your child has the best chance of creating long term neural pathways in the brain that create "highways" for future learning.  Enjoy the pictures.  Some where taking by the children and some where taken by me when the children pointed out an object they found interesting.  I encourage you to repeat this activity at home several times over the seasons.  The recent ice and snow will create some wonderful opportunities to capture fantastic ice pictures.


Building Snowball

For the past several weeks the AM and PM class have been working on a collaborative group project.  The children wanted to build a snowman "as big as the ceiling".   Well, the ladder would only allow us to build the snowman safely a little over halfway to the ceiling but the children seemed happy enough with that.  The children, under Ms. Nancy's guidance, came up with a plan on how to create this giant snowman.  They wanted to make it out of boxes.  They were asked how to make the boxes tall enough, how to keep them from falling and how to cover the boxes so they looked like a snowman.  Ms. Nancy wrote down all of there answers and made a list for the children.  We then made a donation list for the parents and went to Ms. Rita, the school cook and asked her to save boxes for us.  The parents (you wonderful group of people) started bringing in toilet paper and other materials on the children's list and the building/construction on Snowball began.  This process from start to finish took about three weeks.
As you can tell the children had to work together to stack the boxes.  The needed a ladder to make the boxes taller.  Ms. Nancy took the opportunity to talk to them about Paws Laws and being safe when on a ladder, taking turns (being kind) and holding the ladder for friends (being responsible).  Each child got a turn on the ladder if they wanted it.  The children then had to make sure the boxes would not fall over.  They wanted to tape the boxes together.  They also talked about glueing the boxes but thought tape might work better.  You can also see that the boxes were stacked from biggest to smallest.  Concepts of size, number, stability (basic physics), teamwork, planning, decision making and problem solving were all part of the early stages of this project.  Interest in the early part of the project sometimes took a back seat to the newly fallen snow and for days the boxes sat alone and abandoned.  The nice thing about working with the project approach is that the children are not on a time line to finish a project and can return to it when the interest reemerges.
The next stage of the project involved covering the boxes with something to make it look like a basic snowman.  The children talked about painting the boxes.  They also talked about paper mache, but due to wheat allergies in the classroom that was not an option.  Ms. Nancy told them about using watered down glue and shredded recycled paper.  Using recycled paper was a good way to be kind to the environment and take care of the planet.  The children started with paper mache and them moved on to using toilet paper to wrap around the boxes.  They also used some leftover cotton batting we had left over from a holiday craft we did.  They were really good at wanting to use left over materials and wanted to recycle things that had been used in previous projects so they could Be Kind and Be Responsible.  We really do try to reinforce Paws Laws in all of our lesson plans and in our daily interactions with the children.  We hope you are still using the phrases Be Safe, Be Kind, and Be Responsible at home.

In previous posts you have seen that we have been reading the book Snowballs.  The children made the connection between that book and the snowman they were building.  We had been talking about the kind of art used to make the pictures in the book.  The type of art in the book is called collage (many of the children remember this and if you ask them at home they will tell you what collage is).  They wanted to use the collage technique to decorate their snowman.  They also wanted to use as many recycled items from around the classroom and from past projects as possible.  We undecorated the holiday tree and used many of those items when decorating the snowman.


The children wanted to use the book as a reference while creating their snowman.  They were referring back to the book for information.  This is exactly how research is done.  The children are developing the skills needed for researching for writing papers and reports in their elementary, secondary and collage careers.  This skill will follow them into their professional careers as well.  It was amazing to see them make this connection that they could use a book they were reading as a tool to help them create something new.  Bravo!

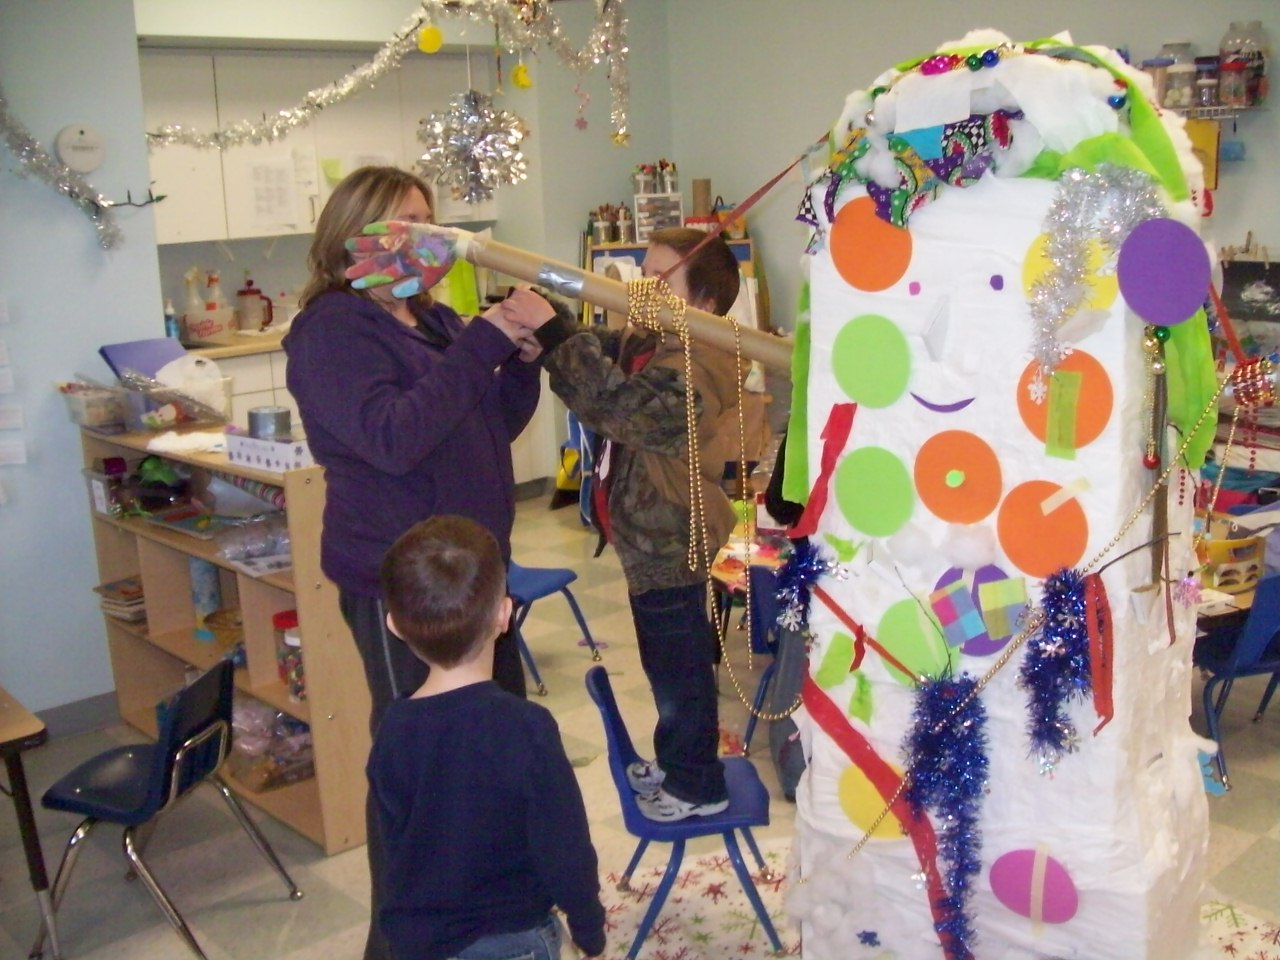
These two children work together to create Snowballs face.  One child added eyeglasses to the snowman because he had eyeglasses.  It was very interesting watching how the children made their decisions on how Snowball was going to be decorated, what materials were going to be used to create each feature and who was going to embellish what part of the snowman.  Sometimes two friends would want to do the same thing at the same time and we would stand back and watch them use their problem solving and social language skills to work through the problem.  Only a few times did the teachers have to step in and guide the children through a particularly difficult conversation.


The children used a variety of collage materials to create different body parts for Snowball.  Here they are using crinkle paper and plastic gloves to makes hands.

The AM class decorated on side of Snowball and the PM class decorated the opposite side of Snowball.  Here you can see the AM side of Snowball.  They said they thought their side kind of looked like Spot in the book Snowballs because Spot the Dog snowman had lots of buttons and their snowman had lots of round spots on him.

Here is the PM side of Snowball.  He has glasses and hands that can hold a cup of hot chocolate.  He is also decorated with lots of snowflakes and beads. 


The Family Fun Fair was held last weekend and the book fair was open.  The classrooms were asked to bring down a display if they had one based on a favorite book.  We were not planning on having a display but the children just happened to come up with this project on their own.  We had to find a way to get Snowball down to the book fair.  The children thought that moving him in a wagon would be the safest way to get him all the way down to the other part of the building.  They had to use teamwork to get Snowball safely through the doorways and down the ramp way to Conference Room C.  The children did a great job working together to get Snowball safely to his destination.

Here is Snowball, safely sitting outside the book fair.  There was a contest for the best display.  Families that attended the Family Fun Fair last Saturday voted and Snowball created by the AM and PM children in room 411 won.  They will have a new train table and trains to play with in their classroom next week.  they will pass it on to other classrooms when they are done playing with it, but it was a nice honor to know that their creativity, teamwork and love of reading and art helped them to create a snowman that brought happiness to all that see him (and to know that he will not melt even when the sun finally does come out!).