Wednesday, March 30, 2011

Blogging for parents

I found this blog on Facebook.  I subscribe to many different early childhood and educator lists, and this came up on my Facebook page tonight.  I LOVE THIS.  It got me to thinking, maybe some of you parents would like some suggestions for momcblogs or dad blogs or parent blogs.  These are blogs that are made by dads, moms, parents that are age appropriate, have ideas by other parents about how to have fun and educate your children at home, and can help connect and expand the community of early childhood educators (and yes parents/grandparents/friends and family, you are THE MOST IMPORTANT EDUCATORS EACH CHILD HAS!). 

So, I am going to start a new section with blogs by parents for parents.  Let me know what you think.  I hope you find it helpful, informative and fun.  The first one I want to highlight is KINDERPENDENT.  You can find it here at http://kinderpendent.blogspot.com/.  Go and check it out.


Monday, March 28, 2011

Week of the Young Child and Family Night

http://www.naeyc.org/woyc

Parents, please go to this link and check out the information on Week of the Young Child.  Your newsletter has some information on the event.  We will be celebrating by having our Family Night on Monday, April 11th for the AM class and Wednesday, April 13th for the PM class.  The event will begin at 6:00pm and last until 7 or 7:30pm on both nights.  We will have an ice cream social and we will be creating our super kid and super family capes!  The capes can be created out of sheets, towels, fleece or anything else you can think of.  We will have material, sequence, ribbons and other fun items to decorate your capes with at the event.  We will take pictures of your family and your child in your super family capes!  It is always a great time.  Please go ahead and put this on your calendars.  We will be sending out more information on the event soon.

Tuesday, March 22, 2011

The Flute with Madeleine

Today we got to go to room 301 and see Ms. Monica's daughter Madeleine play the flute.  She showed us the different parts of the flute and then she played some songs for us.  It was great for us to learn more about how the sounds were made and we thought Madeleine was awesome!  Ms. Monica's other daughter Anneliese played the cello for us (watch for that video in another post) and her son John played the classical guitar for us (that will be posted in another video, they all won't fit into one post).  Enjoy watching these video's together with your child(ren).


Here is the second video of Madeleine playing some songs we could sing along with!

Monday, March 21, 2011

How To Make Duck Soup

This was the book we used for our Friendship Feast in late February.  The children loved this story and we highly recommend it!  It is all about a duck named Max and how his friends help save him from his own soup.  Have the children look at this cover and see how much of the story they can tell you.  This is a great activity for helping them build their long term memory, remembering story details, characters, setting, story sequencing, events, plot and increasing the general love of reading. It helps if you read the book first so you can help them recall the story and the sequence of events.  The following pictures show you how they made their own soup for their Friendship Feast. 
 No ducks were harmed in the making of this soup!


The children cut the potato's with plastic knives after the teachers cut the potato's into smaller pieces.  The children were closely supervised.  This was a great fine motor activity and helped them build the small muscles in their hands that they will need to grasp writing utensils properly so they can form letters and words.


We also did a science experiment with onions.  We cut them on the table and they made us cry!   We talked about the gas that was released into the air when we cut open the onion.  Then we cut the onion under water (we filled up a dish pan with water to do this) and we did not cry.  When you cut an onion under water it diffuses the gas and it does not reach your eyes and your eyes do not get irritated.


We took turn adding ingredients.


Everyone adds a little bit of love to the soup.
 
We asked what Max would add to his soup so the children would have to refer back to the book and take previous learning (from the book) and apply it to current learning (making the soup).  This is how long term neural pathways are formed in the brain.  Children need numerous opportunities to reapply previously gained knowledge to current activities for learning to be meaningful and relevant.


Oh-la-la!  The soup!  (They say Oh-la-la in the book so we said it too!)


Watch out MAX!  Don't eat the duck!
 
The children set the table for their friends in the afternoon class and added Ms. Beth's ducks to the soup.  Thank you Ms. Beth for letting us borrow your little ducks.  We thought they were funny.


We had children that normally would not even try a vegetable try the soup.  Some loved it, some did not like it, but they all tried it.  We think it was because they got to make it.  They were invested in the process.  The activity was more like an art activity than a cooking activity.   The more involved a child can become in an activity like cooking a new food, the more likely they are to try something new.  We all had a great time with this book, with this activity and with each other.  We hope you enjoyed looking at these pictures and talking with your children about this experience.  Feel free to write down their reflections on these pictures and send them to us in an email or in their backpack so we can add it to their portfolio and use their reflections to help us plan further lessons.


Saturday, March 19, 2011

Recipes for Playdough :: PreschoolTeachersTalk.com

Recipes for Playdough :: PreschoolTeachersTalk.com

Lots of great recipes for different kinds of playdough including KoolAid playdough, birdseed playdough, oatmeal playdough and much more. Enjoy! Go to their site for lots more. All of these recipes are from their site and I give them full credit for each recipe.

GLUTEN-FREE PLAYDOUGH* 1/2 cup rice flour* 1/2 cup corn starch* 1/2 cup salt* 2 tsp cream of tarter* 1 cup water* 1 tsp cooking oil* Food coloring, if desiredPreparation:Mix ingredients. Cook and stir on low heat for 3 minutes or until mixture forms a ball. Cool completely before storing in a sealable plastic bag.JELLO

PLAYDOUGH Jello to color,add texture and fragrance1 cup of flour1/2 cup of salt2 tablespoons of cream of tartar2 tablespoons of vegetable oil1 cup of warm water Three ounces of jello – any flavor you wishDirections:Combine ingredients and cook over medium heat until it thickens. Knead until cool enough to touchCLOUD

PLAYDOUGH Ingredients:1 cup salad oil6 cups flour1 cup waterfood coloring or temperaUse just enough water to bind mixture. Knead. Cloud dough is soft, pliable and oily, but provides an unusual tactile experience.

COTTON BALL PLAYDOUGH Ingredients:1 Cup Flour1 Cup Water1 Bag Cotton ballsMix flour & water together to make a paste. Roll cotton balls in paste & carefully lift out, allowing excess to drop off. Form into desired shapes on a baking sheet. Bake for 1 hour at 325 degrees. Can be painted when cool.

PAPER PLAYDOUGH Ingredients:2 cups salt2 cups flour2 cups absorbent paper shredded (kleenex)1 teaspoon oil of cloves

PLAYDOUGH that looks like MUD
Ingredients: 3 cups water3 tablespoons vegetable oil3 cups all purpose flour2 tablespoons cream of tartar1 1/2 cups saltBring water and oil to a boil then stir in the remainder of the ingredients. After dough is formed knead until smooth then add brown tempera paint (either dry or liquid) and 2 or 3 Tablespoons of coffee grounds. It really looks like dirt!

SOAP PLAYDOUGH Ingredients:1 cup Ivory Snow laundry detergent2 cups warm waterfood coloringAdd food coloring to water then add to laundry detergent. Mix with electric beater until fluffy. Use just like play dough.

MOON SAND 6 cups of play sand or colored sand3 cups of cornstarch1 1/2 cups of cold waterStep one: Mix the water and cornstarch together thoroughly, this will take a few minutes to get it nice and smooth.Step two: Gradually mix in the sand, one cup at a time. You’ll need to really work it in with your fingers.Step three: Play with it!Step four: When you’re all done, pop it in an airtight container.Step five: When you next play with it, you’ll need to revive it with 2-3 tablespoons of water. Just sprinkle it over and work it in.

GAKMaterials:* Elmer’s Glue® (8 oz bottle of Elmer’s Glue-All)* Borax (a powdered soap found in the grocery store)* Large mixing bowl* Plastic cup (8 oz size works well)* Spoon* Measuring cup* Food coloring (the spice of life)* Water* Paper towel (hey, you’ve got to clean up!)* Zipper-lock bag (don’t you want to keep it when you’re done?)* Empty plastic soda bottle with cap* WaterHere’s the easiest way to make a big batch Elmer’s Slime. The measurements do not have to be exact but it’s a good idea to start with the proportions below for the first batch. Just vary the quantities of each ingredient to get a new and interesting batch of goo.1. This recipe is based on using a brand new 8 ounce bottle of Elmer’s Glue. Empty the entire bottle of glue into a mixing bowl. Fill the empty bottle with warm water and shake (okay, put the lid on first and then shake). Pour the glue-water mixture into the mixing bowl and use the spoon to mix well.2. Go ahead… add a drop or two of food coloring.3. Measure 1/2 cup of warm water into the plastic cup and add a teaspoon of Borax powder to the water. Stir the solution – don’t worry if all of the powder dissolves. This Borax solution is the secret linking agent that causes the Elmer’s Glue molecules to turn into slime.4. While stirring the glue in the mixing bowl, slowly add a little of the Borax solution. Immediately you’ll feel the long strands of molecules starting to connect. It’s time to abandon the spoon and use your hands to do the serious mixing. Keep adding the Borax solution to the glue mixture (don’t stop mixing) until you get a perfect batch of Elmer’s slime. You might like your slime more stringy while others like firm slime. Hey, you’re the head slime mixologist – do it your way!5. When you’re finished playing with your Elmer’s slime, seal it up in a zipper-lock bag for safe keeping.Recipe from Steve Spangler

SILLY PUTTY Ingredients:2 cups white glue1 cup liquid starchDirections:Mix together with hands. Keep kneading until it forms a silly putty ball. Will take a few minutes of kneeding before the wetness goes away.If it is wet and starch is not bonding, add more glue. If it is sticky, add more starch. Keep kneading until it forms a silly putty ball.Store in an air tight container in refrigerator.

OOBLECK What is Oobleck?Oobleck is a type of non-Newtonian fluid. Most fluids we know of are considered as Newtonian fluids, but non-Newtonian fluids are a strange and perplexing group of fluids. When a force (ex. poking, rolling, stirring) is applied to a non-Newtonian fluid, the viscosity (resistance to flow) of the fluid increases. In simple terms, any force you exert on a non-Newtonian fluid will make the fluid behave more like a solid. The more force you exert, the harder the fluid becomes. Strange but true! Other types of non-Newtonian fluids include quicksand, ketchup, and blood.Ingredients:* 2 cups cornstarch* 3 drops food coloring (if desired)* 1 cup waterDirections:1. Mix ingredients together in a medium sized bowl. (Add water slowly as it may not need entire cup!).Mix together and enjoy!

Friday, March 18, 2011

Capes, Superhero Capes, Kids Capes and Custom Capes • PowerCapes

Capes, Superhero Capes, Kids Capes and Custom Capes • PowerCapes

OK, I will admit it, I am buying one with my Mamapedia points. Every teacher, mother, father, grandparent or other role model for children need a super hero outfit, or at least a cape, don't you think? The kids are interested in superhero's and if we do a unit on them I will need a cape. If nothing else my niece and nephew's will think I am cool! I think I this would be a great classroom fundraiser! This company does that. I would much rather buy a super hero cape than a magazine subscription or a roll of wrapping paper. What a cool present for a child (or a child-like grown up!). I may have to look into that for next year for one of our community service projects to raise money for the children's charity of choice. So, I am off to order my cape. Enjoy the rest of Spring Break.

Mamapedia: An easy and educational way to shop and raise money for United Services

Sign up at Mamapedia and get great savings on child centered products. Even better, when you purchase something from Mamapedia 5% of the purchase goes directly to United Services when you use the code 7LT2 or just look up United Services under schools. It is easy and free and supports your child's school. Today I am ordering 2 years worth of Family Fun Magazine for $5 (I have a credit on Mampedia) and $1 of my purchase went to United Services. I use a lot of ideas from Family Fun Magazine in the classroom. I have bought several things from Mamapedia for the classroom. My sister (she has twin 16 month old boys and a 4 year old girl) sent me a link to this and I have loved it. I thought I would pass it on as an easy fund raiser for the school and as a way to enhance your child's education at home. Many of the Mamapedia deals are for educational products for children and support small businesses with innovative ideas for children and families. I encourage you to check it out. I have also found some really unique gift ideas for my niece and nephews off this site. Most of the items are at least 50 to 70% off which is great for my budget too. Thanks for taking the time to look at this as a way to support our school financially and your child's education. Enjoy! Click on the title of this post and you will go straight to the site through my link. 

Monday, March 7, 2011

Skippy Peanut Butter Recall: Salmonella Risk

Skippy Peanut Butter Recall: Salmonella Risk

2 Skippy Reduced-Fat Brands Recalled; No Illnesses Reported
By Daniel J. DeNoon
WebMD Health News

skippy reduced fat peanut butter
March 7, 2011 -- Unilever on Saturday recalled two brands of its reduced-fat Skippy peanut butter.
Routine tests by the company suggest that the products may be contaminated with salmonella bacteria. Salmonella is a frequent cause of food poisoning and can cause severe infections.
The recalled products, packaged in 16.3-ounce plastic jars, are Skippy Reduced Fat Creamy Peanut Butter Spread and Skippy Reduced Fat Super Chunk Peanut Butter Spread.
UPC codes for the recalled products, located on the side of the label below the bar code, are 048001006812 and 048001006782.
Stamped on the jar lid, the recalled products carry these best-if-used-by dates:
  • MAY1612LR1
  • MAY1712LR1
  • MAY1812LR1
  • MAY1912LR1
  • MAY2012LR1
  • MAY2112LR1
The products were distributed in 16 states: Arkansas, Connecticut, Delaware, Illinois, Iowa, Maine, Minnesota, Missouri, Nebraska, New Hampshire, New Jersey, New York, North Dakota, Pennsylvania, Virginia, and Wisconsin.
Symptoms of salmonella infection are fever, diarrhea (which may be bloody), nausea, vomiting, and abdominal pain. In rare cases, salmonella infection can result in life-threatening blood infections. Small children, frail and elderly people, and people with weakened immune systems are at particular risk of severe disease.
Consumers who have purchased the recalled products should immediately discard the product and contact the company for a replacement coupon at 800-453-3432.

Saturday, March 5, 2011

Igloo Science - The Beginning of the Great Adventure

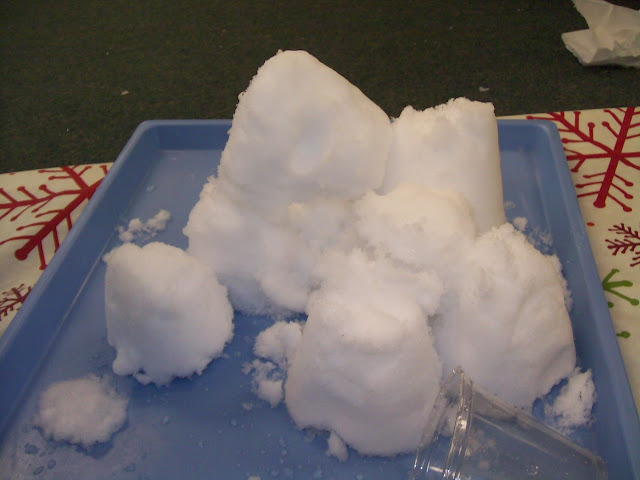
Our unit on Igloo's started in January, and the children's interest has waxed and waned according to the weather.  When the first big snow hit we brought in lots of snow for the children to explore.  We also printed several pictures of igloos for them to view.  They looked at how igloos were designed.  Some of the pictures showed igloos that had satellite dishes and indoor lights.  They were amazed. 


The children started trying to form bricks out of the snow using different types of containers.  They talked about compacting the snow and packing the snow down tightly so it doesn't fall apart when the bricks are stacked on top of each other.

The children did not want to stop working in the snow, but their hands became very cold.  They used their problem solving skills and went and got their gloves and mittens out of their cubbies and put them on.  They continued to work for almost an hour building igloos and making towers.


It took some practice but the children became very good at compacting the snow into the cups and creating their "bricks" for their towers and igloos.  Children need the time and opportunity to practice new skills several times.  We brought snow in every day that week and placed out the cups and containers so the children could "play".  As they played they became more confident and their skills improved.

A teachers job is to guide a child's learning.  Ms. Sarah is helping but only after the child asked for help building her igloo.  Ms. Sarah asked open ended questions such as "how can we make the bricks stick together?", "how tall should be make the igloo?" and other questions to help the child expand her vocabulary and problem solve.  They worked together, Ms. Sarah as the child's guide and the child as the leader, the inventor and the creator.  This is when authentic learning takes place.  The teacher and or parent must take a quiet role and let the child discover through trial and error.

This child is building his own igloo.  This is his first attempt and is learning what is working and what is not working when trying to stack the snow blocks on top of each other.


Sometimes the most fun thing about building a structure is knocking it down.

Some of the children wanted to take their snow blocks outside and try to build a real igloo.  Ms. Nancy acted as their guide helping them find a place where other people would not knock down their structure.


The children did research by studying the pictures of igloos and looking on the Internet to see how the blocks were stacked together.  They tried to recreate what they learned by looking at the igloo pictures.

Here is the very start of their igloo adventure.  They also started a milk jug indoor igloo also because they know this igloo might melt before it ever gets build.  Unfortunately, a big slab of snow fell off of the roof of the building and crushed our igloo before we could get much more done, but the children still enjoyed the adventure!

Friday, March 4, 2011

Baby Kid Expo - Home Page

Baby Kid Expo - Home Page

Bring the family to the 5th Annual Baby Kid Expo which will be held on Saturday, April 30, 2011 from 9:00am-4:00pm at the St. Charles Convention Center in St. Charles, MO. Admission is FREE!

The Baby Kid Expo is THE event for busy families in St. Charles County and the surrounding area to experience, meet and interact with the leading children’s retail, healthcare, recreational and educational providers.

Bring the kids because this event is fun for the whole family


What’s planned for 2011? 

            Cutest Baby/Kid Contest               MoChip Child ID                 Safety Stop
            Muny Kids                                        Game Hype                          Diaper Derby
            Pamper Me Mom’s Zone             Free Speakers                     Healthy Eating
            Cooking with Kids                          Chance to Win a 2011 KIA Sorento
            Story Time                                        Mascots                                Dancers
            Safety Street                                    RAMS Cheerleaders           and more…

Check out our Activities page for all of the details and to Pre-Register for certain events.

Participate in our Raffle and help raise money for Autism Speaks.  autismspeaks

Tuesday, March 1, 2011

The Amazing Milk Magic Trick

Today we did a really cool milk experiment.  We video taped it so you could do it at home with your child.  It is simple and so much fun!  It is also an art project.  I am posting the video and the pictures for your enjoyment.  Let me know if you do this at home.  This is a great project for one of the rainy days when you are stuck inside this spring.


After we finished showing the children how to do the experiment we let the children perform the experiment themselves.  They each got their own pan and filled it half way full with milk.  The practiced their fine motor skills by squeezing one or two drops of food coloring into the milk and just one drop of dish soap into the center of the food coloring.  They then used their toothpicks to make swirls and lines through the food coloring.  They also dropped more plain milk into the swirls of food coloring to see if anything would change.  Below are the pictures of the process and the results.  The children were so involved and the experiment lasted almost 45 minutes.  Who ever said children had short attention spans?  It just depends on how interesting and relevant the project is and how involved they are allowed to be in the process.

Carefully adding a drop of blue food coloring into the pan of milk.

The food coloring immediately separates and flows to the sides of the pan when the dish soap comes into contact with the milk and food coloring.  The concepts of chemical reactions and surface tension are introduced in this activity.

Each child was able to do their own lab experiment.  Children need early exposure to math and science and they need to experience science in a way that is hands-on, fun, magical and fascinating in order to create a life long interest in the math and science arts.  This early exposure to lab experiences and science vocabulary is crucial to creating students who enjoy and not dread taking math and science classes in middle and high school.

Ta DA!  Magic.  The star pattern appears as the soap hits the milk and food coloring.


Now the children are adding additional drops of food coloring after the initial experiment had been completed.  The new drops no longer scatter when the dish soap is added.  Now the colors just merge and swirl.

Milk art.  Now our science experiment is becoming an art project.  Many times art and science are interrelated.  This is way it is critical that art programs remain in school programs.  Children become much more involved in scientific concepts when presented in artistic presentations, such as mixing different colors, different textures, solids, structures, sounds.  As we erase the arts we also erase math, language and science proficiency.

The children used vocabulary words like swirly, layers, mixing, yucky, cool, crazy, combining, coming together, floating, spreading out, moving and many more as they watched the changes as they added, stirred and mixed the colors.

The more we mixed, the more complex the patterns became.

One child said this looked like a storm cloud.  Making these types of comparisons shows the development of higher level thinking and shows that the child is assigning meaning to their art.

The children spent a lot of time trying to find pictures in their milk art.  Some saw rainbows, waves, flowers, hearts, butterflies, blood, chocolate milk, clouds, lines, and roads just to name a few.

What do you see when you look at this picture?  What can you do with a pan of milk, some food coloring, a few toothpicks and some dish soap?  How long can you play with your child, have a conversation, laugh, expand their vocabulary, ask open-ended question, have fun, connect and just enjoy each other's company?  I dare you to play in your milk!  And don't worry if you spill some, we did!