Friday, October 29, 2010

More cool October activities

I wanted to share a few more pictures of some of the activities we did during October.  The first activity was just too much fun.  The children learned about gravity, stickiness, the concepts of up and down, and practiced problem solving when they were asked open-ended questions like  "how can we get the skeletons up onto the ceiling?" and "how can we get the skeletons down from the ceiling?"
What is that on the ceiling of our classroom and how did it get there?  How does it stay there?

Oh, they are sticky skeletons!  How do we get them down?

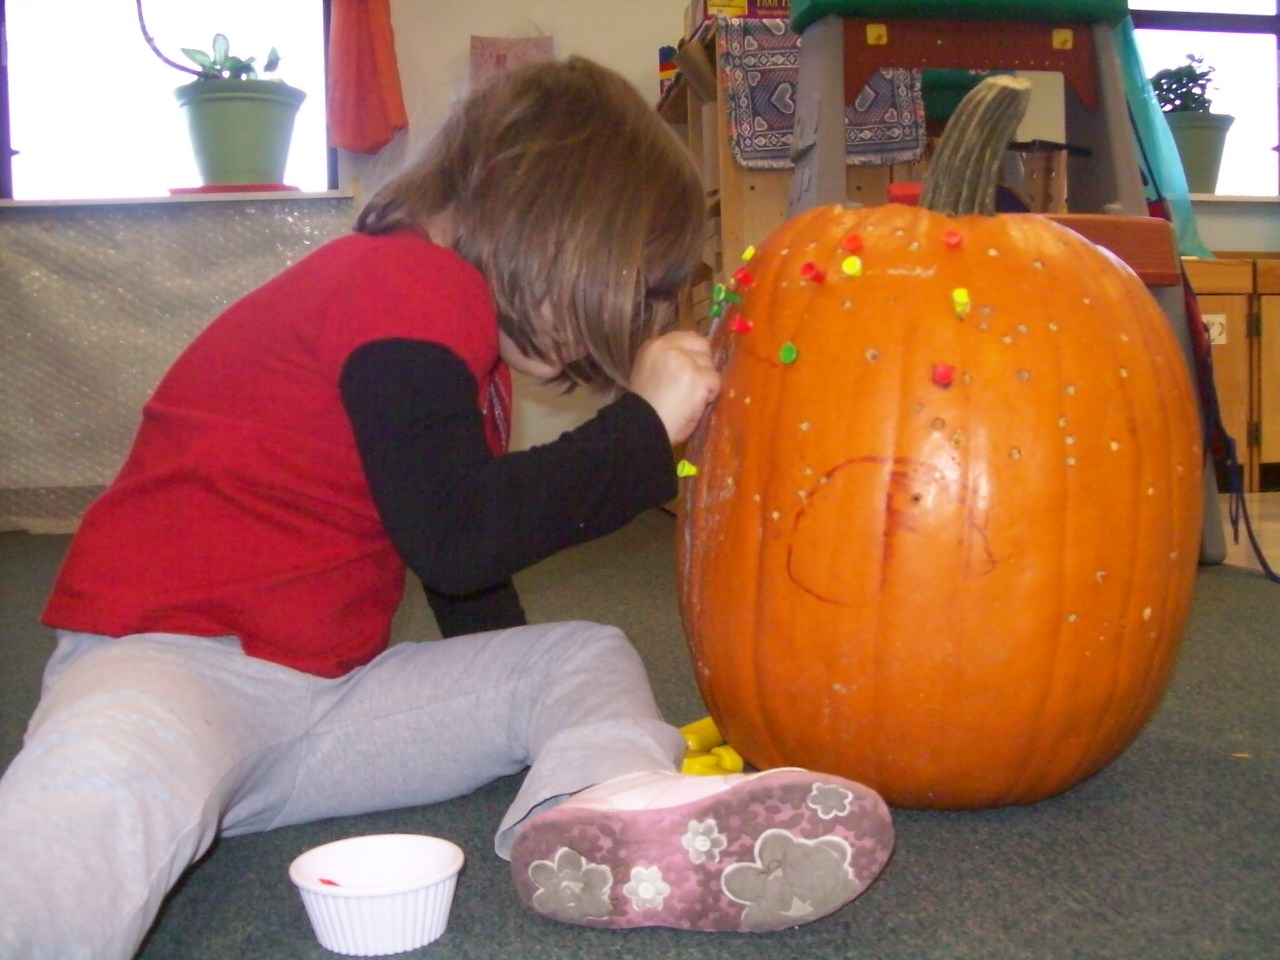
  The next activity used yet another pumpkin from our Daniels Farm field trip.  The children strengthened their fine motor skills by hammering golf tees into the pumpkin.  They had to increase their hand-eye cordination to successfully complete this task. 
The big pumpkin and the hammers.


Decorating pumpkins was a fun activity.  We carved pumpkins.  We colored on pumpkins with washable markers, wiped them off and colored on them some more.  We put stickers on the pumpkins.  But one of the most fun ways we decorated a pumpkin this year was by adding beads, wires and pipecleaners to the pumpkin.  The children said the pumpkin looked like it had crazy hair.  How was this learning?  The children learned many different things during this activity.  Some children sorted the beads by size, some by color, some patterned the beads on the wire (such as green, blue, green, blue) which are all math skills.  Some children counted the number of beads they could fit onto the pipecleaners.  Some children worked together, passing the bowls of beads back and forth to their friends, taking turns, helping each other find particular colors, shapes and sizes of beads (interpersonal, social and problem solving skills).  Language skills, vocabulary and descriptive words were used abundantly during this activity.  Fine moter skills were practiced when the children had to string very small beads onto the wires.  The children were developing their appreciation for art by creating a three demensional sculpture.


The last activity I want to share with you in this post is an activity we used in the block area.  We bought two packages of plastic cups.  We placed them on the shelves with the blocks.  The children attacked them!  We built with them for a week solid.  They had so much fun with them that we are going to leave them there for several more weeks.  We are also going to explore with different styles, shapes, sizes and materials (such as paper cups and styrofoam cups) for building over the school year.  The children first started building with the teachers, then they became confident and started building with each other and by themselves.  They turned the cups over, built castles they could climb into and then found different ways to knock these structures down.  Durning these activities the children learn about balance, structural support, shapes, team work, problem solving, thinking ahead, pre-planning, trying again if something doesn't work out as planned, hand-eye cordination, fine motor practice, concepts such as length, width, tall, short, big, small and long.
Here the children are exploring how to stack the cups in traditional and nontraditional ways.  Some have stacked the cups one into another, some have stacked the cups by stacking the bottom of one cup on top of the bottom of another cup.  They are learning to think in multiply demensions which is critical for higher level math.

The children worked with the teachers and their classmates to create this tall tower.  We learned that this shape is called a pyramid.  It looks like a triangle.  We also realized we could have made a pattern with the colors.

This was the most fun part, knocking the whole thing down! CRASH!

Thursday, October 28, 2010

Drawing Pumpkins

When we went to Daniels Farm we picked out several pumpkins to use in our activities during the fall unit.  One of the activities the children really enjoyed was drawing the pumpkins in their journals.  This is a pictorial documentation of one day of the activity.  They repeated this activity over several days using different pumpkins and gourds.

First we set out one of the pumpkins in dramatic play on the table.  We placed orange and green crayons, markers and some pencils on the table.  We left them there and did not give any special instructions to the children.  The children independently came over to inspect the pumpkin.  Some of the children went and got thier journals out of their cubbies.  They sat down and started drawing what they saw.  The process was amazing to watch.  The language they used in their conversations with each other during the activity was also amazing to listen to.  They talked about the field trip, what they thought was inside the pumpkin, what they were going to wear for Halloween and lots of other unrelated topics.  The children floated in and out of the activity and the mix of children changed often.  This was a great language and literacy activity and the kids had a great time!
We put out the green and orange pumpkin to see if the children would observe the multiple colors and not just color the typical orange pumpkin they see in their minds eye.  This increases their power of observation which is needed for reading and writing in the primary grades and for science activities.

See how this child is using two colors and forming a circle for the shape of the pumpkin.

This child used both the orange and the green seen in the pumpkin and also added a face like she would see in a jack-o-lantern.  When asked about the face she said it was like the one she carved into her pumpkin with her family the night before at her house.  This shows a connection between a present experience and a past experience.

 This was this child's first attempt at drawing the pumpkin.  Notice how large the pumpkin is.  Often the first time representing something in a drawing it is difficult and multiple attempts and practice is needed. 

In this picture you can see how in one journal a child started to add the lines they saw on the pumpkin.  The child in the picture is the same child you see in the previous picture.  She drew the pumpkin multiple times practicing and enjoying the process. You can see she is now drawing the pumpkin smaller and the circle is tighter.  She has spent time studying the pumpkin and is becoming more focused on the details.

 By drawing the pumpkin the children are preparing to make the curves (circle motion) that will be needed to make the curved lines in the upcoming Handwriting Without Tears lessons for the letters with curved lines such as C,D,O,G,Q.

This child is working on their second picture of the pumpkin.  She started with the orange color and and is getting ready to overlay the green over the top.  This shows a different way to look at the formation of the pumpkin and how they see the texture and depth of the colors.

You can see in this picture that this child is enjoying exploring using different writing tools.  He is making lines, scribbles and swirls.  He is also representing the different colors seen in the pumpkin.  He is participating with his peers in the process and feeling very proud of his accomplishments.  He later proudly showed off his pumpkin to his teachers and drew several more pictures in his journal.


Wednesday, October 6, 2010

Daniels Farm - October 5 and 6 Field Trips

This post is to document the fun and friendship that was the AM and PM Room 411 field trip to Daniels Farm.  Thank you to all of the parents and grandparents that went.  I can't tell you how much fun the teachers and therapists had spending part of the day with you and the chidren.  We are so fortunate to be able to share time with you and your children.  We have the best families in the world and it is a joy and a pleasure to be part of your lives.  This was a great adventure.  If you have any suggestions for future field trips that will help enhance the education, friendship and community of the 411 experience please just make your suggestions to us.  Enjoy the pictures.  Also, remember to make a CD of the pictures you took with your cameras and phones and give them to Ms. Sarah or Ms. Carole Dawn.  We will use them in our end of the year presentation.  We took lots of pictures but we are sure you took great pictures too.  Trust me, the more pictures we have the better the presentation becomes!

Parents going into the hay maze.

Kittens in the petting zoo.  One of the kids favorites.

Baby horses! (This is what Ebony called them.)


Deep down into the darkness of the hay maze goes one brave child!
  
Go Ms. Deborah go!

Getting corny.

Going on the train ride.

Ready or not, here I come!
 
Real men drive pink tractors.


Got corn?


Sometimes being a kid just rocks, don't cha think?

A child's view from a tunnel slide.

Friends.

Taking the perfect pumpkin back to school.

Working with Apples

As we wrapped up our September unit on Cooking we worked with apples.  We painted with them.  Cut them open and found the star that hid inside of them.  We built 3-D sculptures with apples.  We tasted them.  We compared and contrasted them (we made a Vienn Diagram which showed us how a green apple and a red apple were the same and how they were different).   We wanted to make apple sauce but we ran out of time!  We did take lots of pictures of our apple sculptures and out apple painting.  We had to work together to create our big apple painting picture.  We had to take turns, roll the apples to each other and be safe so we didn't get paint all over our friends and our floor.  Sometimes it was hard to remember to be slow, but we did a great job rolling our painted apples back and forth across the paper to our friends.  Ms. Carole Dawn and Ms. Sarah also cut the apples in half and let us paint the apples and use them like stamps to print the paper.  For the apple sculptures we worked for two days to string beads, use pipe cleaners and feathers to create our apple creatures!  We were very proud of what we made.  We learned that we are called artists when we use our minds to create new things with our hands.  Here are some pictures of our work.  We hope you enjoy!


Construction Journals

Sometimes in education what is called a "teachable moment" happens.  This is when something that is not in the lesson plan happens and you jump on it!  This happened one day when construction workers had to come and tear up part of the parking lot to fix a water main break.  The workers came and the bull dozers came and the kids were totally involved, interested and full of questions.  Ms. Sarah and Ms. Nancy were ready to take the kids and their writing journals down to the big glass doors and let the kids document the experience.  This was a Thursday morning so not all of the kids were there that day, so if you didn't get to hear about the experience it was a one day only deal.  We hope these pictures help show you how to take advantage of a teachable moment.  Always keep a notebook and some markers or crayons in the car (we pick up spiral bound notebooks and washable markers when back to school items go on clearance).  Keep them in a back pack so you can grab them.  We also have had the kids decorate their journals.  The teachers have their journals too.  We all write in them together almost everyday.  Grab them when you go to the park, when you go to McDonalds, or anyplace!  You will be very suprised to see how much they observe and record.  This is great practice for science skills (observation, recording data), art (drawing, line, perspective) and writing (documentation, scribbling, dictation, writing letters and words).